It began with a vocabulary lesson when Awanthi told me the name of her new foodie blog: Sybaritic Pleasures.
She was working on a quick and dirty logo and came down to trying to decide between these two:sybarite (ˈsɪbəˌraɪt)-n a devotee of luxury and the sensual vices-adj luxurious; sensuous


Thinking about those sensual lips from her prototype logo, I immediately envisioned of a pair of full lips, teeth biting in to a luxurious and decadent piece of fruit. Mango seemed lovely but might read as a peach or slice of cantaloupe. When I think of figs, I think of exotic decadence so I chose that as my initial concept.
 |
| First design |
I decided to change from a profile to straight-on. Instead of a fig, I thought I would do a lovely black grape to evoke the hedonistic imagery of someone reclining on a Roman sofa while eating or being fed grapes. Here are some examples from around the 'net if this doesn't sound familiar to you:
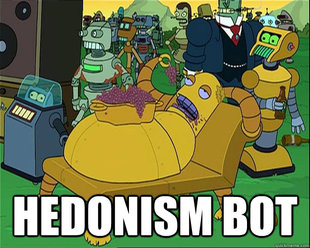 |
| Hedonism Bot from Futurama source |
 |
| source |
 |
| source |
 |
| Second design, version 1 |
We decided to use the picture below as the inspiration to try a blackberry instead.
 |
| source |
 |
| Version 2 |
Since one reason I took on this project was as a self-teaching lesson, I'm really glad our favorite look used the blackberry. It was really hard and I redid several of the drupelets a few times. However, every few spheres, I figured out a slightly better way to use the colors and the gradient mesh. Let me tell you, gradients in Illustrator are MUCH more difficult than in Photoshop or InDesign. The difficulty comes figuring out how to manipulate the mesh to get smooth color transitions between more than two colors. I still ended up graphically cheating in some sections, specifically the highlighted white spot areas. I became too frustrated trying to get such a precise blend and so created a separate object for just the highlight and layered it on top of the blackish/purple sphere. I call this "cheating" because I'm sure it's not the appropriate or elegant way to resolve this, but since I'm only concerned with the final output, there comes a time when I've figured out as much as I can on the "proper" way to do it and just figure out a way to "make it work." Tim Gunn would be so proud!
In working on the blackberry, I did advance my understanding of the nature of the gradient mesh. I used this new knowledge to revisit the mouth construction. I hadn't been happy with the way the gradient was working originally. I couldn't figure out how to also apply a separate gradient to the top lip to create the fuller look like the bottom lip. It turns out the problem went all the way back to my construction! I had made the lips as one solid object and then layered the teeth, gums, and black interior on top. The answer was that I needed to create the top and bottom lips as separate objects to have more control over the gradient mesh. The last step (after seeing the logo on my work monitor) was to give her a good teeth whitening. I removed the light yellowy-brown gradient and used a barely blue gradient instead. Blue brightens the appearance of the white while still allowing for more texture on the tooth.

Final thoughts All in all, I'm really happy with the way it came out! The only thing I don't quite love is that I feel I achieved a great amount of realism on the blackberry, but the mouth is a more vectorized style. However, I didn't want to add in the little lip creases to the lipstick that would have made it more lifelike. So far, she has only used the logo for her profile picture on her Pinterest account. She has yet to decide how (or if) she wants to incorporate it into the actual blog. Speaking of which, I highly recommend you pay regular visits and see what delicious recipes Awanthi has cooked up and shared on
I think it's absolutely gorgeous! I've been trying to figure out a way to update my blog in a way that can incorporate this beautiful logo; it was fascinating to read about the various processes you went through.
ReplyDeleteThank you once again; you did such an awesome job!